By Todd Barron @ FoodieCuisine.com
In my lastest round of testing I decided to BBQ chicken thighs. I’ve never really focused on BBQ chicken as it’s not something I’ve ever been fond of (over pork or beef). After a few tests I will say this though, BBQ chicken is now my favorite item of them all!BrineChicken loses it’s moisture VERY quickly when you cook it. When you smoke meat you have to do so “low and slow” which means cooking it for a long time. Due to this, and the fact that chicken dries out quickly, you must add fluid to the meat.
In the case of chicken, the easiest way to saturate the protein with liquid is to put the chicken in a brine solution. This does two things for you. The first is that it adds flavor to the meat from the salt and other spices you make the brine out of. The second thing is it adds the much needed moisture to the chicken and helps keep it from drying out during the long smoking process. I use the term “long” loosely here as chicken will smoke in right around three hours. This is much quicker than other meats. Brining is simple really once you get used to it.
You will need the following to do this:
- Plastic bags to hold the brined chicken, or a large container that you can fit in your refrigerator
- 1 Gallon Water
- 2 cups Soy sauce
- 1 cup Salt
- Sugar
- Spices (your choice here, depends on what you like)
- Chicken thighs (or whole chickens, I used thighs in this test)
Chicken Brining
The first thing you need to do is fill a large stock pot with water and leave room for the soy sauce and other ingredients. Add the other ingredients to the pot and set it on high. Once the liquid comes to a boil, let it boil for another 10 minutes and then shut the heat off.
Once the brine solution is nice and boiled it needs to cool down to room temperature. This is important because you don’t want to boil the chicken in the hot brine or put the liquid in your refrigerator. If you put hot liquid in the refrigerator it will heat up the inside and create an unsafe food environment (bacteria will grow faster at higher temperatures.) If you put the chicken in the hot brine it will effectively cook the chicken, which is bad as well. If you don’t want to wait a couple of hours for the solution to cool down you can submerge bags of ice (sealed tightly) into the liquid and keep replacing the melted ice until the brine is nice and cool.
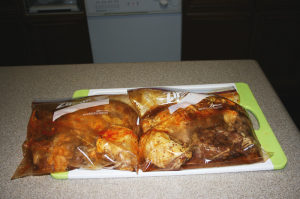
Armed with a room temperature (or cooled) brine, it is safe to put your chicken thighs into the brine. You must use a container that allows you to completely submerge the chicken pieces in the liquid. Look at my photos to see how I have the chicken thighs sealed in plastic bags. They are completely encased in the liquid and I pressed all air out of them as I closed the bags. If I had the room, I would put the chicken in a clean painters bucket (not a used one!) and store it in the refrigerator. Basically you want the chicken to be completely covered with liquid. Put the brined chicken in the refrigerator once it’s submerged and sealed. If you are using a bucket, you may want to put a weight on top of the chicken to keep it from floating.
How long you brine your chicken really depends on what you are brining. For example, I do not recommend brining chicken breasts, as they do not contain enough fat to survive very well in the smoking process. For chicken thighs, and for this test, I brined my chicken for 10 hours. I wanted to simulate competition cooking where you aren’t given a ton of time to prepare your meat once it’s inspected and thats why I went with the time I did.
Rinse and Trim
Once the chicken had brined for 10 hours, I removed it from the brine solution and rinsed it off completely. This is another important steps as you want to rinse off any excess salt that stuck to the chicken during the process. After the thighs were rinsed I then dried them completely with paper towels (or hand towels that I washed before and after.) I put them in a large metal bowl after they were dried off and set them out for trimming.
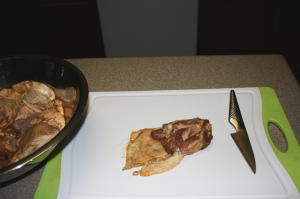
Chicken thighs have a lot of extra skin, fat, and grisle on them that is not appealing to eat. Fat normally would render off in the smoker but given the short time chicken has to smoke, it won’t have time to render completely. This is why it’s important to trim off any excess fat (not quite all of it, but a good amount.) The chicken thighs have fat internal to the meat structure and that will be enough for your needs. For the skin you should trim it enough so that there is a nice flap of skin that just barely covers the top of the chicken thigh. Look at my picture to see the before and after trim of the thigh. In the first photo you can see where I have the skin spread out completely. It is still attached underneath but takes up a large area when spread out. I run the edge of my knife along the thigh and cut off the excess skin that is sticking out. This leaves me a nice cut of skin (not visible in the picture) that just barely covers the bottom of the thigh.
I put all of the trimmed thighs back into the metal pan and proceeded to get ready for the next steps.
Oil and Rub
I go through many steps to ensure the chicken does not get dry while smoking and the oil is another one of those steps. I used peanut oil in this test which is readily available from the supermarket. I poured enough peanut oil into the bowl to coat the chicken thighs and rolled them over a few times to complete coat them in oil. I was careful not to tear the skin from the thighs as it is very easy to do so if you are not careful.
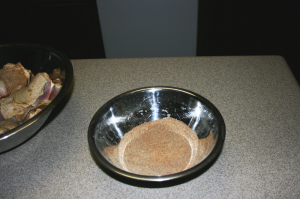
For the rub I mixed salt, sugar, garlic powder, chili powder, onion powder, and some other spices. You will have to experiment here with what you like as your tastes will vary. The spice rub I use is much lighter than the one I use for pork and beef which is why it’s not as red as you may expect. This is mainly due to my leaving out of the paprika. Another thing to keep in mind is that the brine has a lot of flavor in it. This means you do not have to use as much of a spice rub on the chicken as you would on pork or beef. Some people even leave the spice rub off completely since the brining process adds so much flavor.
I liberally sprinkle the rub over the chicken thighs and turn them a few times in the process. I continue adding rub until they are coated pretty well all over. I was careful not to tear of the skin again here as turning the thighs can easily do this. Once I was satisfied with the level of spice coating, I moved to the next step.
Place and Smoke
I’ve watch the show BBQ Pitmasters, on TLC, for just about every episode and one thing I saw them do was to put their chicken thighs into muffin pans. The cooking method allows the thighs to cook into a nice round shape. Sorry Myron, but I consider it a technique and won’t be sending royalties your way anytime soon. 😉
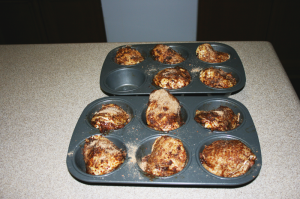
I put the chicken thighs into muffin pans and sprinkled rub over the top of them. I put the thighs in skin-side up and made sure the skin covered the exposed areas. I’m only using a package of eleven chicken thighs for this test so you will see that I am short one thigh for the twelve total spaces available in the pans.
I turned my FEC-100 smoker up to 350 degrees and put the muffin pans in on the 2nd shelf from the top. I let them cook at this temperature for 30 minutes using Washington Apple wood for the fuel. After the 30 minutes passed I lowered the temperature to 226 degrees and cooked them for another 2 hours or so. The internal temperature of the thighs will go past 180 degrees which is fine for chicken thighs. The amount of fat in the thighs allows you plenty of room to play.
Sauce and Serve
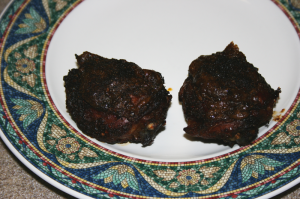
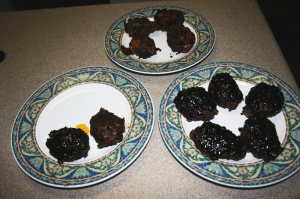
I pulled the thighs out of the smoker and let them rest for about 15 minutes. Resting is important as it lets the meat soak up any juices that were squeezed out in the cooking process. I pulled the thighs out of the muffin pans using tongs and plated them. On half of the thighs I put a homemade BBQ sauce I will talk about in another article. I left the other half of the thighs “dry” without any sauce added. Both types of chicken thighs came out tasting wonderful! You can’t really tell from the pictures but they were very tender and had a great flavor.
At the end of the day I was very happy with the results and will be cooking more chicken in the future. I can’t think of much I would change this next time around except maybe to try different finishing sauces. I hope you enjoyed this article and give BBQ chicken a try yourself in the future.
Eating Light Tip
Most BBQ before you add the sauce is light in fat since it has cooked long enough to render the fat away. The only thing really fattening in this dish other than the sauce is the skin. If you want to remove a few calories, skip the sauce and peel the skin off before eating the chicken. I also pick out any fat that is left over when eating this dish. It’s not much, but as I always say, every little bit helps.
