by: Todd Barron @ FoodieCuisine.com
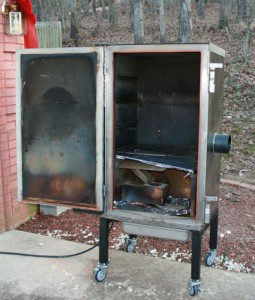
Last week I decided to do another round of brisket testing with my FEC-100 smoker and the end result was one great brisket and one almost-great brisket. The good news of this is that I had a great one finally! I’ve spent the past several months trying to get my brisket recipe (and method) correct and finally have decent results.
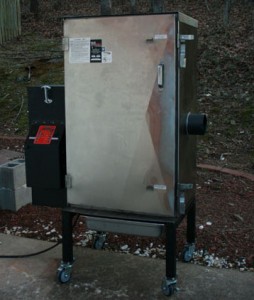
Step back in time for a minute to June of 2009. It was a week before Father’s Day and I had been researching BBQ smokers for over a year. The Fast Eddy 100 from Cookshack was my dream smoker yet I knew it was very expensive for a foodie like myself. Luckily for me I have a supportive family and my wife gave me the go ahead to order the smoker for my Father’s Day present. I must say, it was the best present ever!
I ordered the smoker and it arrived before July 4th, which is the day of the largest party we throw every year. In fact I think it arrived on June 22nd, in plenty of time for the big day. I had a couple of weeks to season it and also try out a few different recipes. Fast forward to January 2010 and by now I have smoked hundreds of pounds of pork and beef as well as a few dozen pounds of chicken and even a couple of turkeys. My pork ribs, pork shoulder, and even chicken turn out very well by this time but I’m still having trouble with brisket. It’s either overcooked, too tough, or too dry for my liking. The flavor has been spot on but the tenderness just isn’t there.
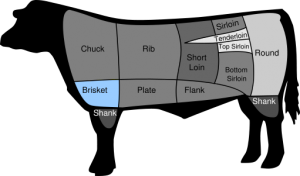
Beef Brisket
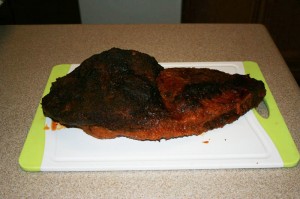
A brisket that includes both parts is called a packer. The two parts refer to the two muscles involved, the pectoralis major and the pectoralis minor.
The flat is the lean part of the meat classified as the NAMP (North American Meat Processors) 102A while the point is the fattier part of the meat classified as the NAMP 120B.
Since the point, or deckle as it is sometimes called, is fattier than the flat it is also more tender when cooked properly. It is also what you would serve a judge in a competition.
Trimming
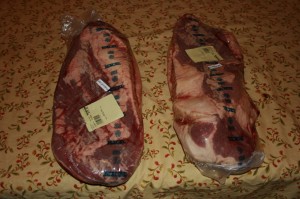
I had visited a Sams Club first but they had very poor looking briskets that only included the flats (no points.) I had given up on smoking brisket that day but stopped by Wal-Mart to pick up some items and noticed that they had two very nice looking 12 pounds briskets for sale! I bought them both and readied myself for another adventure in brisket cooking.
Briskets are big, tough, and not a lot of fun to smoke if you are new to them. I’ve had to force myself to cook them over the past several months since the results have been less than noteworthy but as you will read about, my efforts did finally pay off. So never fear, keep at it if you haven’t had success yet!
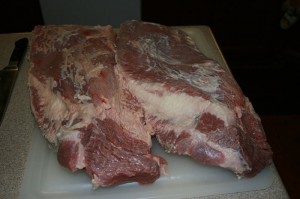
I put the briskets in the refrigerator for a day as by this time it was late and I just didn’t feel like going through the required work to trim, inject, rub, and smoke them. The time wasn’t right either as these things take several hours to smoke and would have been done at around 3am. I decided to let them sit in the refrigerator overnight and tackle them first thing in the morning the next day. After waking up and being ready to take on the brisket experiment I proceeded to cut the meat from the cryovac and wash it. The washing process rinses away any old blood still left in the packaging and also keeps it from being too sticky when it comes to drying it off. After the wash, I dried the meat off with paper towels and then laid them out on a large cutting board to trim them.
For the trimming process I used my MAC SBK-95 Chef’s Knife. I prefer the chef’s knife to all other knives in my inventory and it slices through meat very well. I cut away the large portions of fat, especially where it was hard or stringy, and left some fat in key areas for flavor. The trick here is to not cut away too much since the fat is what keeps the meat moist. You also want to cut away enough that you don’t have any left when done smoking. If you have fat that is left after the smoking process you will either have to eat it (which most judges don’t look too kindly on) or cut it off. Cutting it off is bad because you will have to cut some of the nice crust off with the fat.
Once the meat was nice and trimmed I let it sit out, covered, for a while so that it would warm up a little bit and allow more injection. If the meat is too cold the injection process will be near impossible to accomplish. Beef us hard enough to inject as is and cold makes it even worse (the meat fibers hold together more tightly.)
Injection
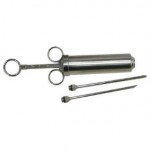
I boiled my injection and let it cool down some before using it. I let it cool because I don’t like how the injection will heat up my injector into something that is very hard to operate without burning my hands. I bought two injectors for this process but ended up liking my Bayou Classic Injector the most.
Rub
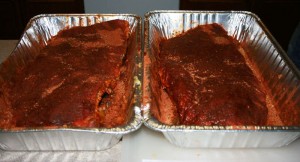
Once the briskets were nice and injected, I used my personal spice rub on them and coated the meat completely on all sides and in every possible crevice I could find. For my spice rub I use paprika, garlic powder, onion powder, salt, pepper, cayenne pepper, and some other fun things I prefer. The recipe you use varies once again here so I suggest you experiment with this to see what you like. In the end it doesn’t affect the tenderness of the meat and is really up to you to find something that fits your personal taste.
Wood
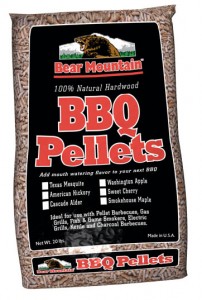
For this test I opted to use Washington Apple Wood to smoke with. There are many things you can choose to smoke with including but not limited to the following:
-
American Hickory is a medium, hard wood perfect for grilling steaks, burgers or chicken quarters with a rich, smoky, flavor.
-
Texas Mesquite is a medium, hard wood more aromatic than hickory, and excellent for grilling burgers and steaks. Has a strong, tangy flavor for red meats.
-
Washington Apple pellets are soft woods, burn cooler and have more moisture in the wood than other pellets with a dense and fruity flavor. These pellets are used for slow cooking fish and large poultry, but also add a nice flavor to ham, pork chops and sausage.
-
Cascade Alder pellets are soft wood, burn cooler and have a hint of sweetness. These pellets are used for slow cooking fish and large poultry, such as turkey.
-
Hood River Cherry pellets are a hard woods and burn at hotter temperatures. Excellent for searing steaks and flash cooking fresh fish.
-
Smokehouse Maple pellets produce a sweet milky flavor and make an excellent compliment to white meats, such as poultry and pork.
The above descriptions are sourced from the site I buy my wood from, Pellet Grill Outlet. I like to order 120 pounds at a time so that I don’t run out at an inconvenient time. Shipping can take a few days so I suggest you keep an inventory of wood on hand. Just remember that vermin like wood so keep an eye out for mice or use a pest control service like I do to keep them away.
The description for Washington Apple Wood says it’s good for fish and poultry but I also find it works very well for brisket and really anything I smoke. Fruit woods are recommended by most champions and I prefer to learn from the mistakes of others. Although I use pellets, the above information applies to whole wood as well if you are a stick burner (person who uses logs as your fire source.)
Smoking
Foiling
This step of the process is debated often by pitmasters, BBQ chefs, and enthusiasts of the trade. Foiling is the process of taking the meat out of the smoking environment and wrapping it in foil or putting it into a vessel that protects it from the smoking area. After you do this step you are essentially steaming the meat and this is why it’s a controversial step. Some will claim that foiling causes the meat to be mushy in texture while others claim that if you don’t foil the meat it will blacken or dry out. Personally, I like to foil my BBQ but ONLY after it has absorbed all of the smoke it can and has the texture that I like.
Finishing Sauces
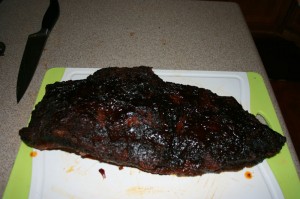
As I mentioned, I put a finishing sauce on one of the briskets. As it turned out, this was the brisket I enjoyed the most. Basically a finishing sauce is a BBQ sauce. In this case I used a mix of ketchup, chipolte peppers in adobe sauce, brown sugar, apple juice, and some other things to add flavor. I cooked the finishing sauce on the stove to blend the brown sugar in with the liquid and poured it directly over the brisket I sauced. It was still steaming when I poured it on the meat and this didn’t bother me as the meat was already hot from the smoking process. I suggest you try out different sauces and see which one you like the best for your own recipe. I typically make spicy food so you may want to skip the chipoltes or use something with less kick.
Carving
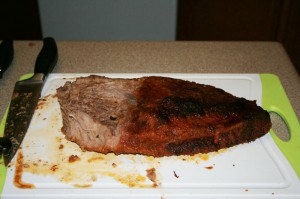
Once the point was removed I sliced the brisket across the grain. This is another area to make sure and pay attention in as the brisket actually has two different grains to it. The grain I refer to is the direction the muscle fibers run. On the flat the muscle fibers go in one direction while they go in another direction on the point. This is why it’s important to not slice the entire brisket as one piece of meat. It’s made up of two different muscles and those muscles run in different directions. Look at the meat carefully and you can see which direction the fibers run in or where the grain is. You want to cut across the grain just as if you were cutting a rope in half. This helps the meat to be more tender as you are breaking the muscle chains that hold it together and can make it tough to chew.
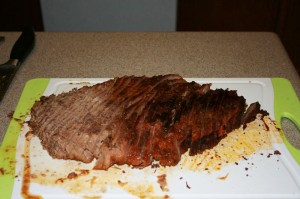
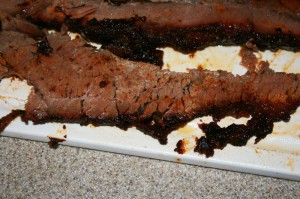
I cut each slice as thin as I could reasonably get it while still keeping the meat intact and not falling apart. If a piece falls apart it will not score very well and ruins the texture you should be striving for. The final texture of a slice should allow you to pull on both ends of it in opposite directions without ripping the slice apart. It should give some though and go back into place after you pull on it. In general you are looking for a rubber-band type reaction when applying forces to a slice. In the photo above and to the left you can see a slice that I pulled on to take a photo of.
Notice how there are spaces in the meat from where I pulled on the ends but the slice did not rip apart. This was my goal for the experiment!
Serve
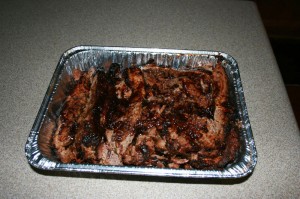
After cutting the points from the flats, scraping away the connective fat, and slicing everything there wasn’t much left to do other than perform a few taste tests and put the meat in pans for distribution to friends and family. At the end of the day the brisket was tender, had the right texture, and tasted great. I still have a few things to do differently next time but believe I finally have a winning method for this tough category of BBQ. I hope you enjoyed reading about my experiment and maybe even learned a thing or two you can use in your own efforts.

Excellent write up Todd. It is inspiring me to try my hand at smoking meats. I look forward to seeing more of your food adventures.
Thanks Scott! Let me know if you give smoking meat a try and how it turns out for you.
If you need some help with the Brisket testing — just let me know! I can definately test!!
I’ll keep you in mind next time. 🙂