By Todd Barron @ FoodieCuisine.com
You may never have cooked short ribs before but let me tell you right now that they taste amazing if you cook them properly. I realize that most things do taste great, if cooked properly, but short ribs are a nice surprise given their low quality on the meat food chain. For this story I made some short rib sandwiches for a Super Bowl Party and they were a huge hit with the crowd. I didn’t have a single one left.
Slow Cooking – Why It Works
The only real way to cook a tough piece of meat into something you would want to eat is to break down the connective tissue and collagen in the meat. This is accomplished through long cooking times or high pressure cooking. You also have the added difficulty of keeping the meat moist during the long cooking required. Keeping the proper mix of moisture during the time required is the hard part of the process but is not insurmountable. If you have read any of my BBQ posts you already know something about this process as slow-cooked BBQ is all about taking tough pieces of meat and turning them into something tasty.
FirstStep – Preparing The Meat
The first step to braising anything be it short ribs, a roast, or even chile verde, is to sear (also called browning) the meat. Contrary to popular belief this does not “seal” in the juices. Juice flows out of seared meat just as easily as it does from raw meat. What searing does though is to brown the outside of the meat and creates a very flavorful taste. It is what accounts for the “roasted” taste associated with braised foods. If you don’t sear the meat, you won’t experience the full benefits of slow cooking. This is one reason that causes slow-cooked items to taste bland. It’s due to too little seasoning as well as not searing or browning the protein (meat) first. Not searing can also cause your dish to turn out mushy and have a bad texture. The browning not only creates a nice flavor but also gives the meat a nice texture.
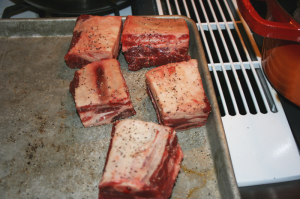
You may be asking about how the meat should be cut? That’s a good question and really depends on what you are braising. Since this article is about short ribs I’ll focus on them. For short ribs, each rib should be about 3-4 inches long. The butcher should cut them for you at this length though so in reality all you have to do is to buy the meat and salt and pepper it. Ah, another step, salt and peppering! That’s right, you must season all sides of the meat before searing it or the seasoning will not stick to the meat.
First off the meat should be close to room temperature. You don’t want to pull it straight out of the refrigerator and then sear it as the meat will take too long to sear. Pull it out of the refrigerator, season it with salt and pepper, and then cover it for 30 minutes to an hour while it comes up to room temperature. A good thing to do before seasoning the meat is to dry it as much as possible with a kitchen towel before you season it. Dry meat is much easier to sear than wet meat since there is no water to cook off first. When the meat is wet, the wet portions must be cooked off before the meat starts to sear.
Second Step – Searing The Meat
Searing is somewhat easy. First, put some olive oil and butter into a dutch oven and turn the heat on high. You should have enough oil and butter to just cover the bottom of the pan but not so much that the meat is submerged in it. You also can use bacon grease for this step if you want a little extra flavor. Many times I will first render some pancetta or sliced bacon in the dutch oven, remove it with a slotted spoon, and add oil and butter to the dish to sear the meat.
Once the oil and butter (or oil and butter and bacon fat) is sizzling hot, add the seasoned and not-so-cold meat to the dish. You should not flip it constantly as that will mess up the searing process. In fact, the meat will stay in the pan much longer than you think it should. Basically you want to almost burn the meat but not quite. This requires some experimentation as there are many factors involved such as the cut of meat, the type of meat, the cut size, the size of the pan, how much oil you used, etc. I use the sniff test and when the meat smells like it is about to burn, I flip it over.
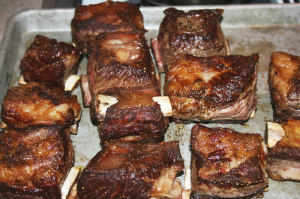
You only have to flip it once as you only need to sear two sides. When you flip it over the seared side should be a dark brown color but not black. Let the other side cook and remove the meat from the pan when the second side smells done. In this scenario I removed the meat to a cookie sheet to let it rest. The entire process used 5 pounds of short ribs which meant I seared it in two batches. You don’t want to crowd the dutch oven too tightly as it can cause searing problems by cooling the pan too much. Strive for about half an inch around each piece of meat if you can.
Third Step – The Base
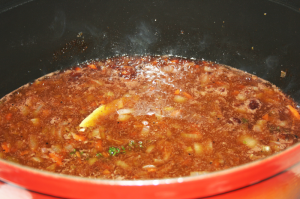
With the meat pulled from the dutch oven I was ready to start the base of the braising sauce. Alsmost all braising starts with a Mirepoix and this dish is no different. It’s simple really as you take very finely diced carrot, celery, and onion and cook it in oil and butter. The trick here is to not clean the pot after braising the meat. You want to leave it as is and not clean it at all. The brown bits left on the bottom of the dutch oven are full of flavor and should not be removed. I did this for my Ragu article and you may read about me doing it for many other dishes.
I also like to add some sliced fresh garlic in when making the Mirepoix along with some crushed red pepper. It gives the dish a little kick and adds another dimension of flavor. Once the carrot, celery, and onion were softened I added the wine, broth, sherry, garlic, bay leaves, and thyme to the pot. I brought the mixture to a boil and made sure to scrape the bottom of the dutch oven until there was no resistence from the seared meat.
Fourth Step – Return The Meat to The Pot
Now comes the easy part where you put the meat you seared back into the pot. If you used any bacon to make the searing oil you should put it back into the dish at this point as well. The meat should barely break the surface of the braising liquid but not be completely submerged. It’s ok if some of it’s submerged but it should not be completely under the liquid if you can avoid it. This is another important step as meat that is completely submerged can have a mushy texture and ruin the effect.
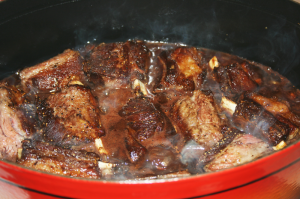
Once the mixture is boiling again it’s then time to turn the temperature down to a very low simmer. I use the lowest setting on my stove. Cover the dish and check on it every 30 minutes to make sure nothing is sticking or burning. The easiest thing to do is to move the short ribs around in the pot every 30 minutes and scrape the bottom of the dish.
Fifth Step – Remove From Heat and Cool
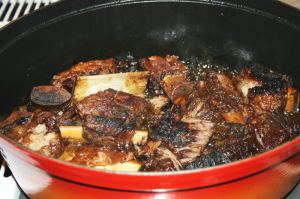
After about 2 hours the short ribs should be done. At this point turn off the heat and set the dish off to the side for the meat to cool with the lid removed or partially on. The cooling process can take an hour or so and really depends on the ambient temperature of your house.
Sixth Step – Prepare the Short Ribs
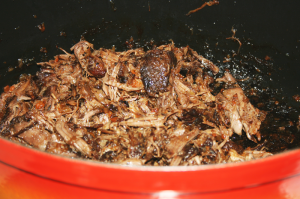
With the meat cooled you remove just the meat from the pot and put the ribs on a work surface such as a large cutting board. Short ribs have a lot of fat and other undesirable elements to them that you must pull away before serving. I used my nature provided tools called hands (washed of course) and pulled the meat away from the bones. There is a sheath around each bone that is inedible as well and must be removed. With short ribs there is quite a bit of throw away material but by starting with 5 pounds of ribs you will have enough meat to make at least 8 sandwiches with lots of meat on each one. Carefully remove all of the meat and put it aside in a nice bowl for use in making the sandwiches.
With the meat pulled away, you then return it to the dutch oven where the braising liquid was. By this time you probably don’t have much liquid left in the pan but you do have tons of flavor in there. Mix the meat together with the braising liquid and you will be left with a pot of very tasty braised beef. At this point you can make sandwiches, chili, or a variety of dishes.
Seventh Step – Making the Sandwiches
I used the recipe from Bon Appetit magazine’s February 2010 issue to make the sandwiches which were pretty simple to put together. I bought a loaf of fresh sourdough bread from The Fresh Market and cut it into 16 slices. I then buttered one side of each slice with Parma Butter (my favorite butter of all time.) I put 8 slices on a cutting board and topped each slice with 1/8th of the meat mixture from the dutch oven. I then topped each mound of meat with freshly shredded Monterey Jack cheese (thank you Jennie for shredding the cheese!). Each mound was then covered with some carmelized onions I had made and finally topped with fresh arugula.
I put a slice of bread on top of the 8 mounds to complete the sandwiches and then used my trusty griddle to cook the sandwiches until they were golden brown. I flipped the sandwiches once, and removed them from the griddle when done. Each was cut into four slices and served straight from the cutting board to the party guests. It took me about 5 minutes to get everyone’s attention to try the sandwiches but word spread quickly and they were gone before I even had time to check on them. In fact I had people coming up and asking if I had more stashed away somewhere. I may have had a personal one slightly hidden away but that was for me. I learned a long time ago that I typically don’t get to eat my own food if I don’t stash a plate away during parties. Luckily my wife does a great job of making me a personal plate that I get around to eating a few hours after the party starts.
I’ll be making braised short ribs again as they tasted absolutely wonderful and at $5.99 a pound they aren’t terribly expensive. Give them a try!
The Recipe I used for this article came from Bon Appetit’s February 2010 Issue:
5 pounds short ribs
1/4 cut butter
3 celery stalks
2 peeled carrots
1 medium onion
1 1/4 cups dry red wine
1/2 cup beef broth
1/3 cup sherry
2 peeled garlic cloves
2 bay leaves
1 thyme sprig (fresh)
The short rib sandwich is attributed to a restaurant called Joan’s on Third in Los Angeles. Stop by and order one of these delectable items if you are in town there!
