No Comments

Crab Quesadillas – Mmmm Good!

Crab Quesadilla

By Todd Barron @ FoodieCuisine.com

It was a good friend of my wife and I’s birthday the other day and we had her over for some crab quesadillas.  I had not planned on making them but she mentioned how she ordered some at a restaurant in town and received fake crab sticks (made from fish) and was quite disappointed. 

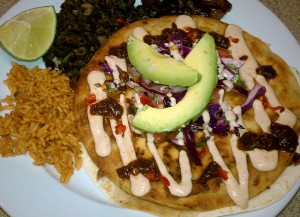
I happened to have a can of jumbo lump crabmeat in the refrigerator that I had planned on using for dinner over the weekend and decided to break it open for the occassion.  I ended up making crab quesadillas using the jumbo crab meat with melted queso fresco and spanish Machego cheese.  I sided the quesadillas with black beans and spanish style rice.  The quesadillas were topped with a fresh slaw, chipolte sour cream, ranchero salsa, fresh avacado, and diced fresno and serrano peppers.  I placed a side of carmalized onions next to the food on the plate along with a slice of lime.

Serves 4 Total (extra Slaw and Toppings)

The Slaw

  • 1/2 Head Small Red Cabbage
  • 1/2 White Onion
  • 1 Bunch Fresh Cilantro
  • 2 Tablespoons Red Wine Vinegar
  • 2 Limes
  • 1 Tablespoon Extra Virgin Olive Oil
  • 1 Teaspoon Sea Salt
  • 1/2 Teaspoon Fresh Ground Black Pepper

You should make the slaw first since it does better with sitting in the lime juice and vinegar for a while.  You should go ahead and remove the can of crab meat at this point from the refrigerator to give it some time to warm up.

Take the core out of the cabbage and then slice it in half.  Thinly slice the cabbage and put the slices in a bowl.  Dice the onion next and place it in the bowl with the cabbage.  Remove the stems from the Cilantro and roughly dice the leaves.  Put half of the Cilanto into the bowl with the other items.

Pour the vinegar over the vegetables and zest one of the limes over the mixture.  Once you have zested a lime, squeeze the juice from both limes in the mixture.  Next add in the oil and spices and toss to coat.  Cover the mixture and set aside for at least 30 minutes.

The Topping

  • 8 ounces Light Sour Cream
  • 2 ounces Chipolte Sauce (or chopped Chipoltes in Adobo sauce)
  • 2 Finely Diced Fresno Peppers (seeds removed)
  • 1 Finely Diced Serrano Pepper (seeds removed)
  • 2 Tablespoons Salsa
  • 1 Fresh Avacado

Mix the sour cream together with the chipolte sauce in a bowl.  If you cannot find chipolte sauce, use the same amount of chipolte peppers in adobo sauce and finely dice it.  Set the bowl to the side or put the sauce contained into a dispenser for later.

Cut the avacado in two, remove the pit, and slice it into thin slices.

The Quesadillas

  • 16 ounce Can Jumbo Lump Crabmeat
  • 8 Soft-Taco size Flour Tortillas
  • 2 Cups Shredded Queso Fresco
  • 1 Cup Shredded Spanish Machego Cheese
  • 1 Tablespoon butter
  • 1 Bunch Fresh Green Onions
  • 4 Slices Proscuitto (optional)

Open and drain the crab meat if you have not done this so far.  Also be sure to shred the queso fresco and the Machego cheese.   Chop the green onion into small cubes and set aside in a bowl.

Heat a large griddle to 400 degrees to cook two quesadillas at a time on.  If you do not have a griddle, get one!  Just kidding, if you do not have one you can cook one quesadilla at a time in a large non-stick skillet.

Chop the proscuitto and put it on the griddle.  Cook it for about 4 minutes or until it is crispy.  Remove it from the heat and set aside.

Put half of the butter on the cooking surface and let it melt.  Once melted, add two tortillas to the griddle.  Top each tortilla with 1/4 cup queso fresco.  Then top the cheese with 4 ounces of crab meat.  Top the crab meat with 1/2 cup machego cheese and sprinkle the cheese with 1 Teaspoon of the cubed green onions.  Sprinkle a slice worth of diced proscuitto over each quesadilla.  Finally, top each tortilla mound with another flour tortilla and let the quesadillas cook.

The amount of time the quesadillas cook varies on the temperature of your griddle or skillet.  Barely raise the edges with a spatula and turn them over once they are golden brown.  On my griddle this took about 5-8 minutes.  Once they are flipped, cook for another 3-5 minutes or until golden brown.  Once they are golden brown on both sides, remove from the heat.

Putting it all Together

To assemble, put one quesadilla on each plate. Top each quesadilla with 3 Tablespoons of slaw.  Drizzle one Tablespoon of sauce over each.  Then sprinkle 1/4 Serrano pieces and 1/2 Fresno pepper pieces over each quesadilla.  Finally, top each with 2 slices of avacado and serve.

Final Notes

  • The Cheese will hold the crab meat in place when you flip the quesadillas.  This is why I put the cheese on in two layers with the crab in between. 
  • The proscuitto has low fat content but is high in flavor and adds a good kick of saltiness to the flavor of the dish. 
  • The slaw is “oniony” but the vinegar and lime juice helps to cook the vegetables.  The juice and vinegar will also soften the cabbage. 
  • The chipolte sauce tastes great but is low in calories due to using light sour cream. 
  • The peppers add great flavor but no calories.
  • Queso fresco is mild.  This is why I add the Machego cheese to the mix as it is more tart and has a good amount of flavor to add.
  • Crab meat is low in calories and is a great item to make quesadillas out of.
  • I may have left something out of this recipe as it was made up with about 10 minutes of forethought. 🙂
No Comments

Greek-Style Pork Chops

By Todd Barron @ FoodieCuisine.com

Greek Pork Chop

One of the magazines I subscribe to is Cooking Light and it has a good looking recipe for Greek-Style Pork Chops in it’s July 2010 issue.  I thought I’d give it a try and made it over the weekend.  The family loved it!

The recipe is rather simple and makes 4 servings.  4 servings means the recipe feeds four people by the way.  When reading food labels make sure you check to see how big each serving is.  This can make a huge difference in the number of calories you are consuming.  See below for nutritional information on this dish.

I did modify the recipe a little by adding the kalamata olives to the vegetable mixture.  The olives added some much needed flavor in my opinion.

Ingredients

  • 2  tablespoons  red wine vinegar, divided
  • 1  teaspoon  dried oregano
  • 2  teaspoons  olive oil, divided
  • 2  garlic cloves, minced
  • 4  (4-ounce) boneless center-cut loin pork chops
  • 3/4  cup  plain fat-free Greek-style yogurt
  • 1  tablespoon  chopped fresh dill
  • 1/2  teaspoon  salt, divided
  • 1 1/2  cups  diced plum tomatoes (about 2 medium)
  • 1  cup  diced seeded cucumber
  • 1/2  cup  diced red onion
  • 1/2 cup diced kalamata olives (seedless!)
  • Cooking spray (or a teaspoon of olive oil)

Marinate the pork

The first thing you need to do is marinate the pork.  Take a large zip-lock bag and put the pork into it along with 1 tablespoon of vinegar, the oregano, one teaspoon of olive oil, and the garlic.  Let this sit on the counter for 20-45 minutes depending on how cold it is.  If the pork is frozen you need to thaw it in the refrigerator before you do this step.  Do not thaw it on the counter as this will promote bacteria growth and can lead to illness or worse. 

Prepare the dill topping

The topping is made from yogurt which keeps the calories down.  Luckily, it’s very easy to make!  Mix the yogurt and  the dill in a small bowl.  Mix it well enough to where the dill is blended throughout.  Set aside or in the refrigerator if you are waiting to cook the pork.

Prepare the vegetable mixture

This is the easiest part of the meal to make.  Take the tomatoes, cucumber, onion, and seedless kalamata olives and dice them all into small cubes.  Put the diced vegetables in a bowl and mix in the remaining tablespoon of vinegar.  Add 1/4 teaspoon of salt and one teaspoon of olive oil to the bowl and toss the mixture well.  Set the mixture aside on the counter.  It does not need to be refrigerated while you finish everything else.

Cook the pork

Heat a non-stick skillet on medium-high and once it’s hot, coat the cooking surface with cooking spray or a teaspoon of olive oil.  Once the cooking spray starts to bead, or the olive oil is runny (this tells you it’s hot,) add the pork to the skillet.  Sprinkle the top of the pork with the remaining salt (1/4 teaspoon.)

Do not over-crowd the skillet with the pork as this will keep it from browning properly.  This is actually a “rookie” mistake to make as the meat will cool off the skillet if over-crowded.  At most, you should cover 2/3 of the cooking area with meat.  If you need to, cook the pork in batches.  Just be sure to wipe the cooking area down in-between batches or you will be cooking with burnt left-over pieces.

 Cook the pork for about 4 minutes, until its golden brown on the one side, and then flip it.  Cook it on the flipped side for another 4 minutes until golden brown and remove it to a plate.  The meat should rest for about 5 minutes.  The resting period gives the meat time to soak the juices back up that it released during the cooking process.  If you do not rest the meat it will end up dry.  This applies to steak as well, so always let your meat rest after cooking. 

To be sure your pork is cooked, make sure it reaches an internal temperature of 150 degrees.  It needs to be hotter than this to meet FDA requirements, but it will continue to heat up while it rests.  This is important to remember as meat continues to cook after you remove it from the grill or stove.  It doesn’t magically stop cooking unless you put it in a blast freezer. 🙂

Toast the bread or tortilla

I served the meal with warmed up corn tortillas.  The recipe calls for pita bread but I didn’t have any handy.  Pita also has more calories which I think are unnecessary.  For the dinner I heated up four corn tortillas and put one teaspoon of the dill/yogurt mixture on each one for serving.

Serve

Fold the corn tortillas in half, with the dill mixture in between the folds.  Put about a cup of the vegetable mixture on each plate and set one pork chop to the side.  Top the pork with a tablespoon (or more) of the dill topping and you are ready to go!

Nutritional Information per Serving (not including the tortilla)

  • Calories:233
  • Fat:9.3g (sat 2.8g,mono 4.8g,poly 0.8g)
  • Protein:30.1g
  • Carbohydrate:5.7g
  • Fiber:1g
  • Cholesterol:70mg
  • Iron:1.2mg
  • Sodium:361mg
  • Calcium:74mg
No Comments

Turkey has half the Calories of Chicken

By Todd Barron @ FoodieCusine.com

Turkey is good for you

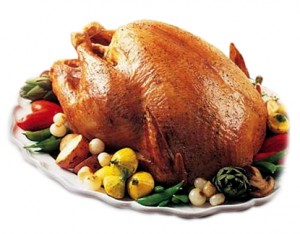
Food was being ordered at a meeting I was at yesterday and I made a comment about how I wanted a turkey sandwich over a chicken sandwich.  A colleague seemed surprised at my choice and I explained to him that I chose turkey over chicken because turkey is lower in calories. What surprised me was that he didn’t know this fact.  It started me thinking about how most people may now know about this so here is the information front and center.

When you compare the two, and are looking at breast meat (not the dark stuff,) turkey has about half the calories of chicken.  It also has about one ninth of the same grams of fat!  That means that you can eat twice as much turkey in a meal and consume the same amount of calories.

When you are on a diet, you can use every bit of food you can get and twice as much meat can mean a huge difference. This is the primary reason I eat so much turkey when losing weight.  I make turkey picatta, turkey Parmesan, turkey meatloaf, and many other things with turkey instead of using chicken, beef, or pork.  The only time you need to be careful is if you consume liver as turkey liver has twice the number of calories as chicken liver.  I’m really only talking about white meat here though so keep that in mind.

The only time you need to look at chicken is if you are watching the amount of protein you consume.  Chicken has twice the protein as turkey.  I do not recommend high protein diets though as they do not promote long-term healthy eating habits.

Here are a few tips for using turkey over chicken in your cooking:

  • Buy a whole breast of turkey and cut it into medallions for quick cooking or buy the medallions pre-cut
  • Sear medallions using a small amount of oil and butter and then cook at 400 degrees in an oven until its done
  • Turkey will dry out very quickly
  • Do not try grilling turkey breast (see above)
  • Buy 97/3 turkey when using it in ground taco meat or meatloaf (100% fat free will be too dry)

Enjoy!

No Comments

Best Burger in Vegas – Burger Bar

by Todd Barron @ FoodieCuisine.com

While in Vegas I ate at the Burger Bar, not once, but twice.  That should tell you something right there as I don’t normally eat at the same place twice in a single trip.  Their burger was so good I had to go back and get another. 

The Burger Bar in Mandalay Bay, Las Vegas, is a casual place that does not require reservations.  There are booths to sit at on the side, with tables in the middle, and a long bar on the other side (with stools.)  On both nights I visited there were many people but we never had to wait more than five minutes to get in.  The restaurant is owned by French chef Hubert Keller, of Top Chef Masters fame, who also owns the Fleur de Lys.  Burger Bar is one of his less formal ventures but is successful in a few different states already.

My wife and I were seated the first time at a table in the center of the isle.  There was a lot of traffic around us but it did not get in the way of enjoying the food.  The menu is pretty straightforward with choices of burgers (of course,) chicken sandwiches, and even a salmon burger.  You can choose a huge variety of toppings to put on your burger ranging from onions to foie gras.  You have a choice of a half-dozen or so cheeses along with any condiment you can imagine.  For the meat you can pick “regular” hamburger or Snake River Farm’s American Kobe beef.  Alternatively you can choose salmon or chicken.

Burger Bar Kobe Burger

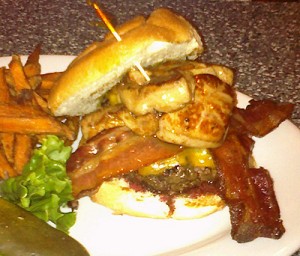
We both ordered the Kobe burger ($17 each) prepared Medium Rare.  I had mine topped with foie gras ($18), bacon ($5), and cheddar cheese ($3) and my wife had hers only with cheddar cheese. 

We received our food in less than fifteen minutes and I could tell right away that the meat was not pre-formed.  It fell apart when I picked it up and had an amazing texture.  This is a far cry from the pre-formed patty I had at BLT Burger while in town and was superior in every way. 

The burger was moist, had a great flavor, and kept me wanting for more.  The only thing I would change is to leave the bacon and cheese off of it (which I did the next time around.)  My wife’s burger was great as well.  The sweet potato fries I had on the side were okay, but I wasn’t really paying attention to them.

We had a great experience at Burger Bar and went back for another great time.  I recommend stopping by if you are in town as you will not be disappointed!

Burger Bar
3930 Las Vegas Boulevard S. #121A
Las Vegas, Nevada 89119
702-632-9364

Sunday – Thursday 11am – 11pm
Friday & Saturday 11am to 1am


Burger Bar (Mandalay Bay) on Urbanspoon

No Comments

Gnocchi – Satisfaction Without the Calories

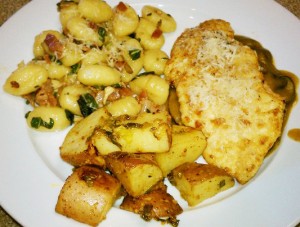
Gnocchi with Sage, Pancetta, and a butter sauce

by Todd Barron @ FoodieCuisine.com

I made gnocchi, chicken, and roasted potatoes the other night for a quick dinner and was thinking about how many people probably don’t know about the great ingredient of gnocchi.

Gnocchi is made in modern times from potatoes and generally is low in calories and fat.  I say “in modern times,” because gnocchi was originated in the Middle East dating back to at least Roman times and was made from dough (flour, eggs, water, etc.)  You can still find it made from various items but the one I cover is made from potatoes.  Regadless of the ingredients, gnocchi gets its name from its shape which means “lumps.”  You can tell gnocchi from it’s signature shape (little lumps.)

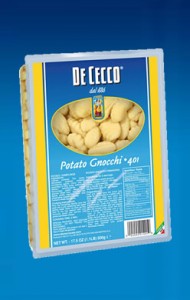
The gnocchi I use, De Cecco, has 240 calories, 0.5 grams of fat, and 3 grams of fiber per serving (with 3 servings in a container.)  One serving is enough for one person and when you combine it with a small piece of chicken it’s even more filling.  The added bonus here is that its made from potatoes, which keep you full for a long time.  This is especially true when compared to pasta.  Pasta is close in calories and fat but will leave you hungry sooner than gnocchi.

So how do you make it?  That’s the beauty of gnocchi as it’s easy to make a version that tastes wonderful and will keep you and even kids coming back for more (my sons love it.)  Keep in mind that I do not cover how to make homemade gnocchi in this article.  I use pre-packaged fare which some will find offensive, but the full article on making it yourself comes later. 🙂

De Cecco Gnocchi

Ingredients

  • 1 Package Gnocchi (you can find this in most grocery stores by the pasta)
  • 1 Tablespoon fresh minced Sage (leaves)
  • 4 ounces Pancetta
  • 1 Tablespoon Fresh Grated Parmigiano-Reggiano Cheese
  • 1 Tablespoon Butter
  • 1/4 teaspoon salt
  • 1/8 teaspoon pepper

Fill a large pot with water and turn up the temperature to high to boil it.  Proceed to do the next steps while you wait.

Chop up the pancetta into small pieces and pan-fry it until crisp in a large skillet.  Remove from the skillet and drain on a plate with paper towels (to remove any excess fat.)  Do not wash out the skillet but do remove it from the heat to prevent burning.  Add in the tablespoon of butter at this point but leave off the heat.

Chiffonade the Sage.  Chiffonade means to slice fresh herbs or leafy greens into long thin strips.  You do this by putting the leaves of the Sage next to one another, rolling them into a tight bundle, and then slicing the bundle thinly.

Once the water is boiling, add the gnocchi and cook according to the directions (this only takes a few minutes.)  While it is boiling, turn the heat up to medium on the skillet with the butter in it.  When the gnocchi is done, remove it with a slotted spoon and add it to the skillet.

Toss the gnocchi in the butter and add the salt, pepper, and pancetta to it.  Now add the fresh Sage and serve.  Top each serving with the grated cheese.  See how easy that was?

In the future try making gnocchi with the following ideas and create your own!

  • Gnocchi with butter, garlic, and Pamigiano-Reggiano cheese
  • Gnocchi with Gorgonzola cheese
  • Gnocchi with butter, basil, garlic, and Pamigiano-Reggiano cheese
  • Gnocchi with red pasta sauce

Enjoy!

No Comments

BBQ Brisket over the Weekend

Brisket

By Todd Barron @ FoodieCuisine.com

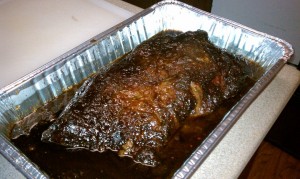
I made a 11 lb brisket over the weekend and used a rub from Cookshack along with a sweet/spicy finishing sauce that I made myself.

To the right you can see the brisket after the smoke, and after it cooled for 30 minutes.

I smoked it at 235 degrees for about 18 hours, using a blend of Apple and Cherry wood.

I wasn’t worried about making this one “competition” style so I didn’t trim it or do much other than rub, smoke, and serve.

It turned out great though!

No Comments

Tips for Grilling Steak

Grilled Filet

By Todd Barron @ FoodieCuisine.com

I had a small dinner party over the weekend for my wife and some friends.  For the party I made the following:

  • Arugula salad with homemade vinaigrette, sliced macadamia nut pieces, and fresh tomato
  • Homemade pasta ravioli filled with French goat cheese, topped with a sage/butter sauce and fresh corn
  • Filet Mignon, grilled to Medium/Rare, topped with sage/butter sauce
  • Chocolate eclair for dessert (that I did not make, bought from Fresh Market)

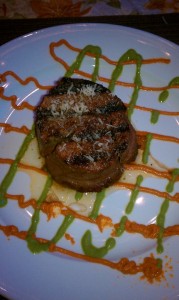
I grilled the steaks on my Green Egg grill and everyone raved about how much they liked them.  I made two sauces that you can see criss-crossed on the plate in the picture.  The first one, a pesto sauce, was made with fresh basil, fresh parsley, garlic, olive oil, salt, pepper, anchovies, and lemon juice.  The second one, a sun-dried tomato cream sauce, was made with sun-dried tomatoes, heavy whipping cream, water (to thin it out), roasted red bell peppers, fresno peppers, salt, and some sugar (to remove the bitterness.)

Since the steaks turned out so well I figured I’d share with you how I grilled them.

  1. Remove the steaks from the refrigerator
  2. Dry them completely
  3. Cover and let them come up to room temperature
  4. Use charcoal and heat the grill up for at least 20 minutes
  5. Only use real charcoal, not the pressed stuff that (it should look like burnt wood)
  6. Put 1 teaspooon of olive oil over each steak, coat thoroughly
  7. Put cajun seasoning + salt liberally on both sides of each steak
  8. Set on grill but not directly over the flame
  9. Close lid
  10. Only turn the steaks once they have grill marks on the bottom, about 5 minutes
  11. Let the steaks grill until they reach an internal temperature of 135 degrees
  12. Remove from the grill
  13. Let sit for 5 minutes
  14. Remove the toothpicks and bacon (keep the bacon on the side for those who want it)
  15. Pour 1 teaspoon on herbed melted butter over the top of each steak
  16. Serve

Some things to note here. 

  1. The olive oil keeps the steaks from sticking to the grill.  Its much easier, and more effective, to oil the steaks than it is to oil the grill surface. 
  2. Use a LOT of seasoning.  This is a trick the steak-houses use.  There is no need to marinade the steak or let the seasoning sit on them for a long time with this method.
  3. The steaks will continue to cook even when off the grill.  This is why I remove them at 135 degrees.  By the time they are served they reach 150+.
  4. Filet Mignon is super tender and should not be cooked past Medium-Rare.  You may like steak that is very cooked, but it’s really not necessary with a good filet.
  5. I use a temperature probe that I can leave in the grill.  It’s a probe that connects to the reader via a fire-proof cable.  I recommend you use one, or more, when grilling.  I personally have 4 that I use when BBQ’ing, but some may say that is a little overkill. 😉
  6. The butter added at the end helps keep the steak juicy and is another steak-house trick.  It won’t add many calories and is worth it.  I recommend making a herbed butter with thyme as the herb or garlic butter for this purpose.

Enjoy!

No Comments

No BBQ this weekend :(

By Todd Barron @ FoodieCuisine.com

I stopped by the Wal-Mart Super Center on the way home to pick up some pork butt and brisket for a little BBQ’ing this weekend and they were completely out! 

Oh well, no adventures in BBQ’ing to report on this weekend.  Maybe next weekend though. 🙂

I did manage to have a small dinner party and made fresh pasta (ravioli,) along with filet mignon that turned out great.  I’ll fill you in on the details later.